Your Cart is Empty
{# PADRE SIN ENLACE #} Electronic Collars
{# PADRE SIN ENLACE #} Collars and Leads
{# PADRE SIN ENLACE #} Dog Tracking Systems
{# PADRE SIN ENLACE #} Dog Training
{# PADRE SIN ENLACE #} Bird Launchers
{# PADRE SIN ENLACE #} Hunting Dog Supplies
{# PADRE SIN ENLACE #} For The Hunter
Updating with Garmin WebUpdater
March 02, 2022 3 min read

It's important that you keep your Garmin GPS tracking handhelds and collars updated with the latest software version to ensure the best tracking results. Below we are going to do a walk-through of how to use Garmin WebUpdater to update the software of your devices.
The first things you’re going to need are a computer with Internet connection and your USB cable. If updating a dog device, you’re also going to need your charging clip. It’s also a good idea to make sure the devices have a good charge to them before starting, just to eliminate any possibilities of issues arising when you disconnect the device. Next, you’re going to want to install Garmin WebUpdater onto your computer. This is done by going to the Garmin Updates and Downloads page, which you can find by using an Internet browser and searching “Garmin WebUpdater”. Click the download link that fits your computer description and follow the download directions. Once you have that installed and loaded, follow the following steps.
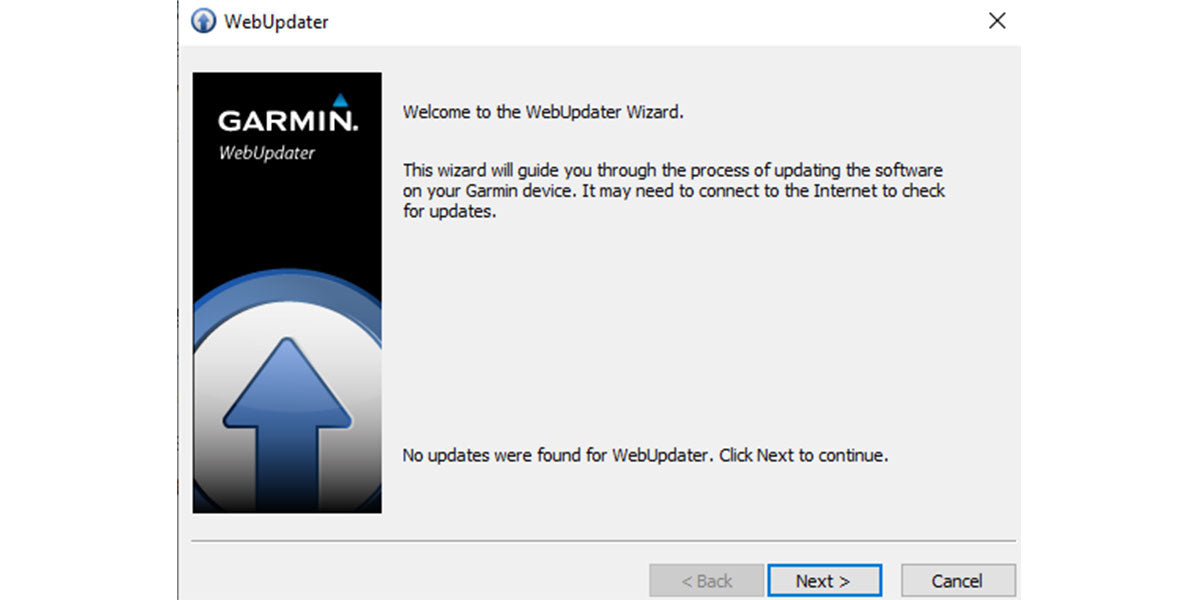
- When you first bring up the WebUpdater, you are going to see the screen pictured below. This screen will let you know if there are any software updates for the WebUpdater program. Click “Next >” to move the next step.

- Plug your device into your computer using the USB connector. Make sure that the device is powered on. Once it is connected, the program should see the device and display the device name in text field. If the device does not automatically appear, click “Find Device” and after a few seconds, your device should show up. Once your device is displayed, click “Next >”.

- The next screen that you see can be one of two screens. One could be the “Your Garmin device already had the latest software version” or “The following update was found:” - which I’ve included an example of an Astro 320 handheld that needed updated.

- Depending on if your device is up to date or not, you can chose to reinstall the same version to try and fix any errors or you can chose to install the latest updates. Once you click “Next >”, the following screen will appear with release notes on the most up-to-date software download.

- Click “Next >” and the next page will display the software change history for your device. After reviewing the change log, click “Next >” again.

- The next page is the Garmin Software License Agreement. Read through the agreement and click the “I agree to the above terms”. Then click “Next >” to install the update software. Depending on the speed of your computer and how many updates you needed to download, this could take a few minutes.

- After the updated software is completely installed, click “Cancel” to quit. The program will close and your update is completely downloaded.
- Final step is to unplug your device from the computer and power on the device. Once powered on, the device will install the updates and is then ready to use. Before using your device, we always recommend to place it in clear view of the sky and allow it to communicate with the satellites to ensure best tracking results.
Thank you for reading our guide to updating your Garmin device using Garmin WebUpdater. If you have any questions about this process, please leave us a comment below, give us a call at 1-800-662-5202, email us at service@lcsupply.com, or message us on our live chat.
Leave a comment
Comments will be approved before showing up.
Subscribe
Sign up to get the latest on sales, new releases and more …
Featured Products

Subscribe
Sign up to get the latest on sales, new releases and more …
Lion Country Supply — Trusted Hunting Dog Supply Store Since 1974 | Over 50 Years Serving Bird Dog Owners


